The DD's Comprehensive Guide to Saving Money By Growing Your Own Food, Part VI: Planting Your Seeds and Transplants
I have to apologize for the lack of updates to the blog lately. My son, now nine months old, has finally learned how to crawl. As such, it's hard to sit down for any length of time to write, as he gets into everything not nailed down! Little rascal. Today's article will be worth the wait, though.
After months of planning, preparing and composting, we are finally ready to sow some seeds in our garden outdoors. If you missed one of the sections of this guide, you can get to Part I, Part II, Part III, Part IV, and Part V by clicking the on each of the links. They contain important information leading up to this part of the series, so review them if you need to before reading this article.
Today's focus will be on how to plant your seeds and transplants out in the garden, spacing considerations, and general tips on how to best utilize your garden.
This is going to be a mammoth of an article, as there is a lot of information to cover. So grab a cup of coffee or tea and set aside a bit of time to read and review all the material. It's planting time!
Make Sure the Soil Is Ready
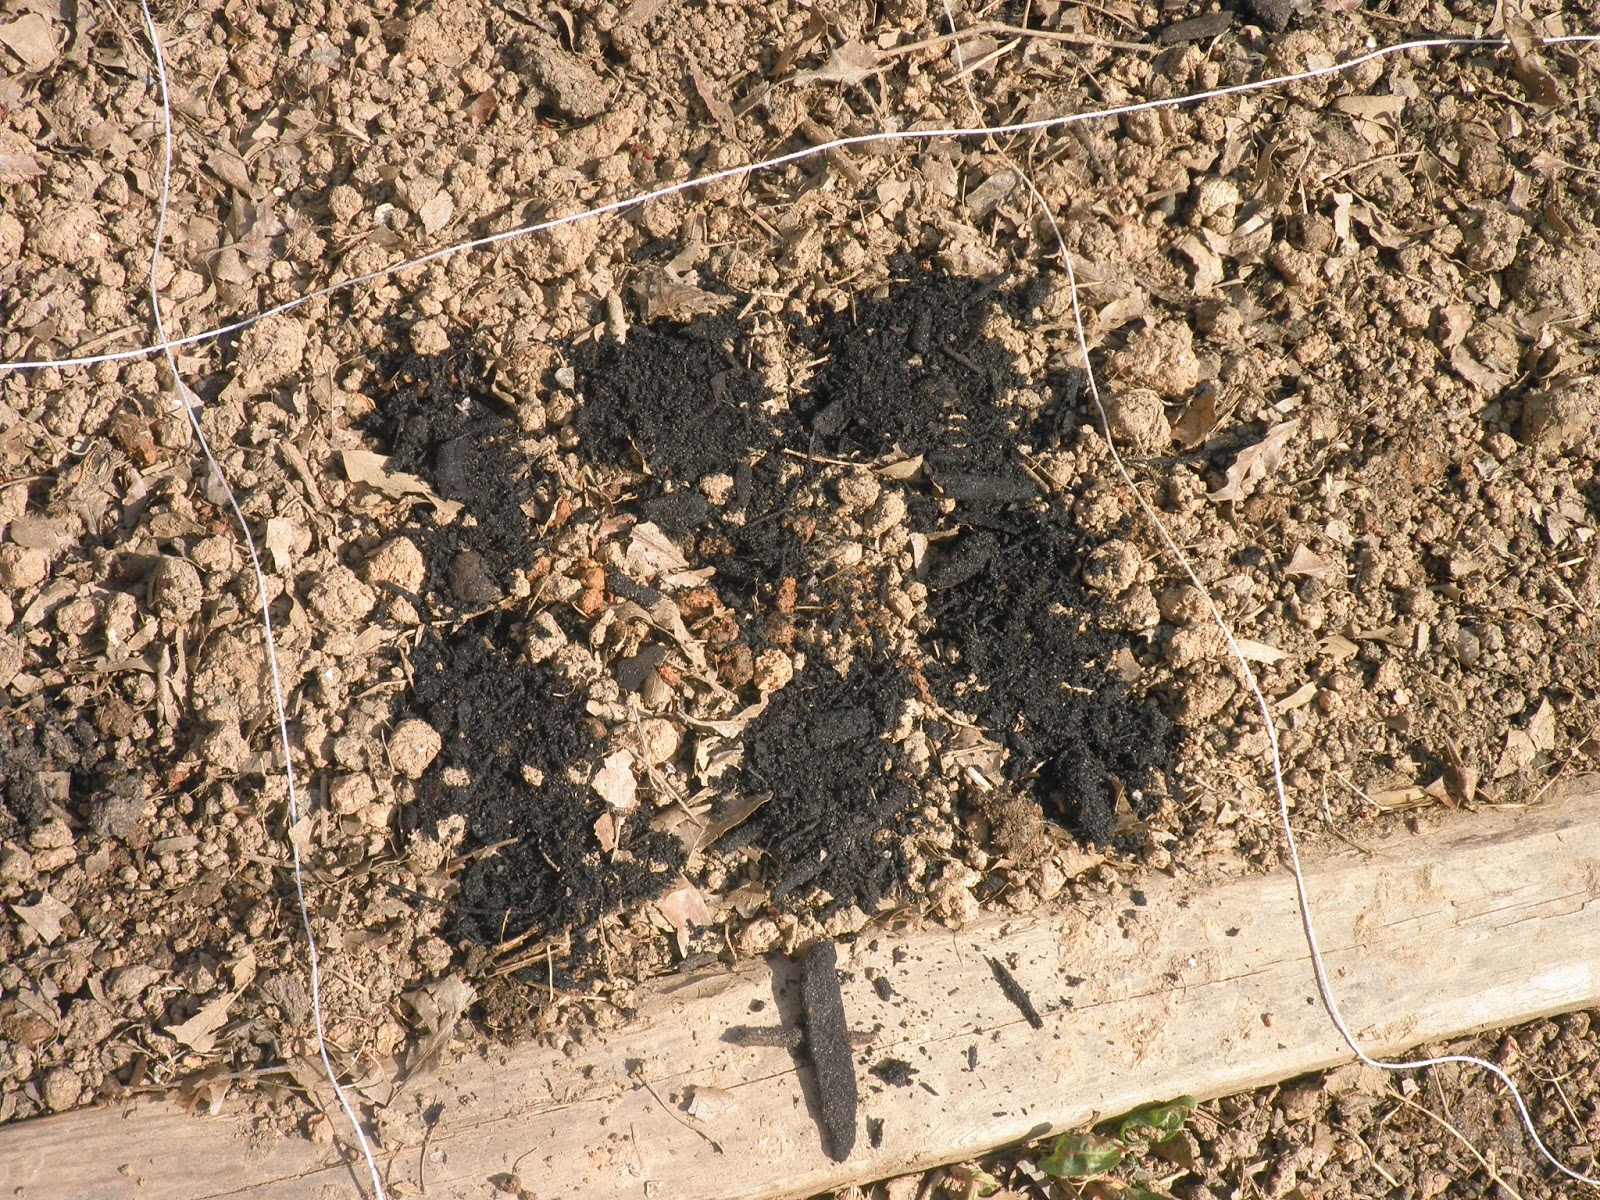
If you recall Part IV of the guide, we made a nice flat bed with compost and leaves, mixed it all together with the underlying soil, and let it sit for a few weeks to further decompose. It might have looked a little something like this:

The goal is to further prepare the soil for planting by removing large pieces of debris and leaves, as well as smoothing the ground out. You can remove obvious chunks by hand, and then use a rake to collect any remaining leaves. The rake will also allow you to level the bed to a nice, even height. Once you accomplish this, it should look more like the following picture.

You may notice that there are strings laying over the bed in a grid fashion. It has to do with a particular method of gardening known as "Square Foot Gardening". This method will allow us to grow as many plants together in one area as possible. That leads us to the next section.
Square Foot Gardening
Square Foot Gardening was developed by Mel Bartholomew as a way for anyone interested in gardening to easily grow a large amount of vegetables and flowers in a small space. It is characterized by growing either 1, 4, 9 or 16 vegetables in each square foot of space in the garden, depending on which vegetable is being grown. Veggies that take up a smaller space, like carrots, can have up to 16 of them in one square foot. Larger vegetables, like broccoli, can only support one plant per square foot. The spacings allow the plants to create a natural shade surrounding each square foot of plants, reducing water loss from evaporation and keeping the plants cool in the heat of the summer.
Additionally, crops won't have to be rotated like a traditional garden would need. Each square foot should have a different kind of plant in it, and none of them should have the same plant in an adjacent square. In this way, we can keep pests down naturally without having to worry about what was last planted in each space.
However, the original square foot gardening method is quite costly, as the ingredients for the soil mixture (known as "Mel's Mix," consisting of peat moss, vermiculite and compost) are quite expensive, especially if you have more than one bed you are constructing. Like I mentioned earlier, however, if you have been following my frugal food-growing guide, you already have a wonderful bed for your veggies to be planted in.
The only other thing we need to do now to really accomplish square foot gardening is to lay down a grid that divides each square foot evenly. You'll need a tape measure and something to use as a grid. I used cotton twine, which can be had for a dollar at the Dollar Tree for 420 feet. If you want to get fancy with it, you can use wood, metal or anything else that will hold a straight line over your bed.
Use your tape measure to mark off each foot of width in the bed, and lay down your material across the bed in a straight line until it reaches the other end of the bed. Do the same thing with the length of the bed. Once you finish, you'll have a neat little grid that makes each square foot obvious, like in my picture above. Congrats, you just built a square foot gardening bed! Now to plant some stuff...
Sowing Seeds Into Your Garden
The size of the plants you intend the grow determines how many plants you can put in each square foot. Here's a rough guide to help you figure it out:
Once you have figured out the appropriate spacing for the veggie you intend to plant, make holes in the soil for each seed to be planted in.
If you are planting one plant in a square foot, put a small hole right in the middle of the square.
For four plants, separate the square into four equal boxes by imagining a "+" symbol in the square, and put a hole in each of the boxes within the square.
For nine plants, divide the square into nine equal sections by imagining a "tic-tac-toe" grid within the square, and put a hole in each of the boxes of the grid.
For 16 plants, separate the square like you would for four plants (remember the "+" symbol), then instead of putting one hole in the center of each box, put four holes spaced equally apart in each of the boxes.
In the picture below, I am getting ready to plant spinach, which can be planted up to nine plants per square foot. To do this, just make a few holes in the surface of the soil with your finger.

Once you have made all the holes, drop three to four seeds in each one, like so:

Then, use a very small amount of your Dollar Tree soil bag to cover the seeds. Using the bagged soil will help your seedlings have an easier time germinating since it is very loose and easy to push through. Unless you already have perfect soil in your yard, the seedlings may have a tough time pushing up through the soil towards the light since the yard soil will likely crust over, especially if it rains hard. Again, using the bagged soil will prevent this from happening. If you are really worried, you can even put a little bagged soil in the hole before planting the seeds. I've done it both ways and haven't had problems with either method. This is what it should look like at this point:
Now that you have your seeds planted in the ground, the final step is watering. Water is the key ingredient to kick-start your seeds into sprouting. When you water the bed, try to ONLY water the areas with the bagged soil. Not only will this help you conserve water (remember, we're trying to be as frugal as possible here), but it will help keep weed seeds that you can't see in and on the soil from sprouting. In this picture below, I've watered my spinach seeds in a vertical line since there isn't that much space between the seeds. To the left, I've watered only the center of this square foot, as I have only planted one area with seeds in this square foot... it happens to be kale in this square. The rest of the square is dry.

That's it. With any luck, within a few days (or weeks, depending on the type of seed and the weather) you will see some sprouts popping out of the bagged soil mounds to soak up some sunlight.
Planting Transplants
Before you can put your transplants into your outdoor garden, you first have to do a process known as "hardening-off." To avoid a massive wall of text to read, I am going to forgo explaining it here. Instead, I will link you to a guide that covers everything you need to know. Just be gentle with those little guys and everything will work out just fine.
Anyway, there's isn't much to putting transplants in your garden. Before removing your plant from the pot, take notice if the soil in your pot is very dry. Give it some water if it is.
Dig a hole of an appropriate size for the potted plant you want to transfer into the garden. Carefully tip your potted plant upside down and it should come out in one big chunk. If it is stuck, squeeze the side of the pot as lightly as possible and it should then fall out. Place the roots of the plant into the hole and cover it with dirt. Press down slightly on the top soil of the plant to secure it into place. Finally, water thoroughly to help the plant adjust to its new home.
That's all there is to it. Now just watch your plant grow!
Take Advantage of Your Surroundings
While our main square foot garden bed will provide a good portion of our vegetable harvest, it never hurts to use what space you have available to the fullest potential. Many parts of the yard and house can be used as space for growing vegetables as well. It doesn't necessarily have to conform to the shape of a box.
I've listed a few examples below, but the key is to observe your own yard and identify ways to improve the efficiency of your growing operation.
Making A Free Trellis
The area I have to work with is about 100 - 120 sq. ft, give or take. Not a huge amount of space at all, and some of it is even shaded. However, my property is lined with a fence in the vegetable garden area, which can be used as a trellis for vegetables that grow on vines, like peas, green beans, tomatoes and more. All it takes is a little work.
I recently stopped by the Dollar Tree just to look around, and I noticed there was a stockpile of 420 ft. cotton yarn cylinders for $1 a piece. I bought one and used it to make a trellis out of my fence. I simply tied a long strand of yarn from each fence post every two feet in height. Here is the result:

I then planted different varieties of peas directly underneath the yarn. My hope is that the peas will use the yarn to climb the fence and produce lots of pods while still only using a small amount of space in the yard, since they will be growing vertically. I will update the guide with my results once the peas get large enough to climb.
If you don't have a fence, you can make a simple trellis from old sticks or branches. Look for some old sticks that may have fallen out of a tree in your yard (if you have trees), or ask your neighbors for the limbs they cut after pruning trees.
Once you have the wood, simply stake the sticks into the ground and use the cotton yard to tie them all together at one end. Then plant your seeds underneath the structure you just built. The seedlings will attempt to climb up each of the sticks, although you may need to assist them at first. This method will probably take up more space than using a fence, but you acquired the materials for virtually nothing.
Using Shade From Trees to Your Advantage
You can take advantage of the deciduous trees by planting tender greens--like lettuce, arugula, watercress, ect.--under them in the later winter and very early spring. The sun coming through the leafless tree branches in the winter will allow the seeds to germinate and grow a bit before the tree's leaves come in mid-spring, where it will provide a perfect spot in the shade for said greens. Leafy greens tend to bolt, or send out seed runners, when the soil gets too hot for the plant to handle. This helps the plant survive by producing seeds for the next generation of greens, but it has the bad side effect of making the greens terribly bitter. Keeping the soil moist and cool, like a semi-shady area under a deciduous tree, will keep the plant from bolting too quickly, extending your harvest.

The picture above shows the perfect area for my tender greens. Right now, it receives full sun for most of the day and it's a great spot for my lettuces to establish themselves. In a few weeks, however, a giant oak on my property will produce new leaves for the spring/summer and provide a nice shady area for the lettuce to maintain its growth over the season without going to seed and becoming bitter.
These are just a few ideas I have put to use in my own garden. Try doing a search on google or GardenWeb for more ideas on improving your garden efficiency.
More Tips
Efficient Water Practices
Water is a costly resource. If you get it through a local utility company, you don't want to be relying solely on that supply line to keep your plants watered. Otherwise, whatever money you might save on growing food will be overshadowed by increased water bills. I mentioned earlier that you should only water the areas of dark soil when you plant your seeds. This will go a long way in conserving water, as you be concentrating the watering on the only part of the soil you want to be wet. Compare this method to using a hose nozzle or sprinkler, which is designed to water large grassy areas and uses large amount of water, most of which goes to areas you don't want or need to be watered anyway.
Using rainwater caught in plastic containers or buckets is also a very good way to be efficient with your water usage. All you need to do is get a large container (1+ gallons, preferably), set it outside, and wait for it to rain. You'll want to figure out a way to cover the rainwater container, or put it in an area protected from the outside environment. Otherwise, it will quickly become a breeding ground for mosquitos.
Personally, I have collected a few 5-gallon buckets from various projects over the years and they make perfect rainwater collectors. I leave the buckets open until it rains, then cover them with a lid afterwards. Once I have rainwater collected, I use a plastic drinking cup with holes pokes in the bottom as a home made watering jug. It works well and I almost never need to use water from the tap for my garden.
Use the Seedlings You Thinned Out of Your Main Garden
Another trick I learned is that when you thin out your seedlings once they germinate, instead of just killing the extra sprouts, carefully pull them out of the ground and replant them somewhere else. It's a waste to just let the plant die when it can easily grow just about anywhere with dirt. If the plant dies, it's no big loss anyway, and if it lives, you'll have that much more food. If you have enough bag soil left over after everything, you could even pot it up and move it around the yard.
My wife is constantly being surprised when she finds some spinach or broccoli seedlings in her beds after I thin out my own seedlings. But she always welcomes more food being grown.
Use Weeds As Mulch/Compost
Don't throw those weeds in a bag. Toss them into the compost pile. They are a valuable source of nitrogen. You can also lay down cardboard boxes on the areas you step in the garden and cover them with pulled up weeds to create a mulch that prevents new weeds from sprouting.
And don't worry about weed seeds in your compost pile. Because we know exactly where we are planting our vegetable seeds in the square foot garden, any weeds that sprout outside of that area can be easily pulled up and removed without worrying that it was something important. Watering efficiently will also keep a lot of weeds from ever sprouting in the first place.
Succession Sow
Keep your harvests going all season long by planting seeds at two week intervals. By doing this, you will be harvesting fresh produce all season instead of everything being ready for harvest all at once.
Final Thoughts
If you've followed the guide from the beginning, you'll noticed we've accomplished quite a lot of work over a long period of time. The hardest part is now behind us. Other than a few random tasks like mulching and weeding, all we have to do now is sit back and wait for our food to grow. Similarly, since the most prudent information in this guide has now been published, this series is drawing to a close. Don't worry, though. I'm still going to post updates on the status of my garden, so you can see just how successful the garden will be using most of the techniques outlined in this guide. I will be writing a new series for that in a few weeks--stay tuned for that.
As always, if you have comments or questions on this part, or any part of my frugal food growing guide, I encourage you to make use of the comment form below. I love getting criticism as well as praise and questions, because they all help me improve as a gardener. I know in its current state, this guide is far from perfect, but for now I will consider it "mostly finished." I hope you were able to take anything mentioned here to help you save money, time and resources. Happy gardening!
Total Costs So Far
The total cost of growing your own food so far:
My total costs for this year: $28.11 (for vegetable/flower seed packets, potting soil, cotton yarn)
(We really wanted beets this year, and Dollar Tree was sold out of beet seeds. My wife found Burpee seed packets of beets at Walgreens for 40% off, as well as some flowers she had been wanting. That brought my total costs up by $3.57, in addition to the cotton yarn ($1.00)... for a total of $28.11 spent on gardening supplies. I will upload the receipt soon.)
The next article is going to deal with plant maintenance, problems like diseases and pests, and few other random tidbits I left out of all the other articles. Stay tuned!
After months of planning, preparing and composting, we are finally ready to sow some seeds in our garden outdoors. If you missed one of the sections of this guide, you can get to Part I, Part II, Part III, Part IV, and Part V by clicking the on each of the links. They contain important information leading up to this part of the series, so review them if you need to before reading this article.
Today's focus will be on how to plant your seeds and transplants out in the garden, spacing considerations, and general tips on how to best utilize your garden.
This is going to be a mammoth of an article, as there is a lot of information to cover. So grab a cup of coffee or tea and set aside a bit of time to read and review all the material. It's planting time!
Make Sure the Soil Is Ready
If you recall Part IV of the guide, we made a nice flat bed with compost and leaves, mixed it all together with the underlying soil, and let it sit for a few weeks to further decompose. It might have looked a little something like this:
The goal is to further prepare the soil for planting by removing large pieces of debris and leaves, as well as smoothing the ground out. You can remove obvious chunks by hand, and then use a rake to collect any remaining leaves. The rake will also allow you to level the bed to a nice, even height. Once you accomplish this, it should look more like the following picture.
You may notice that there are strings laying over the bed in a grid fashion. It has to do with a particular method of gardening known as "Square Foot Gardening". This method will allow us to grow as many plants together in one area as possible. That leads us to the next section.
Square Foot Gardening
Square Foot Gardening was developed by Mel Bartholomew as a way for anyone interested in gardening to easily grow a large amount of vegetables and flowers in a small space. It is characterized by growing either 1, 4, 9 or 16 vegetables in each square foot of space in the garden, depending on which vegetable is being grown. Veggies that take up a smaller space, like carrots, can have up to 16 of them in one square foot. Larger vegetables, like broccoli, can only support one plant per square foot. The spacings allow the plants to create a natural shade surrounding each square foot of plants, reducing water loss from evaporation and keeping the plants cool in the heat of the summer.
Additionally, crops won't have to be rotated like a traditional garden would need. Each square foot should have a different kind of plant in it, and none of them should have the same plant in an adjacent square. In this way, we can keep pests down naturally without having to worry about what was last planted in each space.
However, the original square foot gardening method is quite costly, as the ingredients for the soil mixture (known as "Mel's Mix," consisting of peat moss, vermiculite and compost) are quite expensive, especially if you have more than one bed you are constructing. Like I mentioned earlier, however, if you have been following my frugal food-growing guide, you already have a wonderful bed for your veggies to be planted in.
The only other thing we need to do now to really accomplish square foot gardening is to lay down a grid that divides each square foot evenly. You'll need a tape measure and something to use as a grid. I used cotton twine, which can be had for a dollar at the Dollar Tree for 420 feet. If you want to get fancy with it, you can use wood, metal or anything else that will hold a straight line over your bed.
Use your tape measure to mark off each foot of width in the bed, and lay down your material across the bed in a straight line until it reaches the other end of the bed. Do the same thing with the length of the bed. Once you finish, you'll have a neat little grid that makes each square foot obvious, like in my picture above. Congrats, you just built a square foot gardening bed! Now to plant some stuff...
Sowing Seeds Into Your Garden
The size of the plants you intend the grow determines how many plants you can put in each square foot. Here's a rough guide to help you figure it out:
- Seed packet spacing: 12" - plant one per square foot
- Seed packet spacing: 6" - plant four per square foot
- Seed packet spacing: 4" - plant nine per square foot
- Seed packet spacing: 2-3" - plant 16 per square foot.
Once you have figured out the appropriate spacing for the veggie you intend to plant, make holes in the soil for each seed to be planted in.
If you are planting one plant in a square foot, put a small hole right in the middle of the square.
For four plants, separate the square into four equal boxes by imagining a "+" symbol in the square, and put a hole in each of the boxes within the square.
For nine plants, divide the square into nine equal sections by imagining a "tic-tac-toe" grid within the square, and put a hole in each of the boxes of the grid.
For 16 plants, separate the square like you would for four plants (remember the "+" symbol), then instead of putting one hole in the center of each box, put four holes spaced equally apart in each of the boxes.
In the picture below, I am getting ready to plant spinach, which can be planted up to nine plants per square foot. To do this, just make a few holes in the surface of the soil with your finger.
Once you have made all the holes, drop three to four seeds in each one, like so:
Then, use a very small amount of your Dollar Tree soil bag to cover the seeds. Using the bagged soil will help your seedlings have an easier time germinating since it is very loose and easy to push through. Unless you already have perfect soil in your yard, the seedlings may have a tough time pushing up through the soil towards the light since the yard soil will likely crust over, especially if it rains hard. Again, using the bagged soil will prevent this from happening. If you are really worried, you can even put a little bagged soil in the hole before planting the seeds. I've done it both ways and haven't had problems with either method. This is what it should look like at this point:
Now that you have your seeds planted in the ground, the final step is watering. Water is the key ingredient to kick-start your seeds into sprouting. When you water the bed, try to ONLY water the areas with the bagged soil. Not only will this help you conserve water (remember, we're trying to be as frugal as possible here), but it will help keep weed seeds that you can't see in and on the soil from sprouting. In this picture below, I've watered my spinach seeds in a vertical line since there isn't that much space between the seeds. To the left, I've watered only the center of this square foot, as I have only planted one area with seeds in this square foot... it happens to be kale in this square. The rest of the square is dry.
That's it. With any luck, within a few days (or weeks, depending on the type of seed and the weather) you will see some sprouts popping out of the bagged soil mounds to soak up some sunlight.
 |
| Spinach seedling |
Before you can put your transplants into your outdoor garden, you first have to do a process known as "hardening-off." To avoid a massive wall of text to read, I am going to forgo explaining it here. Instead, I will link you to a guide that covers everything you need to know. Just be gentle with those little guys and everything will work out just fine.
Anyway, there's isn't much to putting transplants in your garden. Before removing your plant from the pot, take notice if the soil in your pot is very dry. Give it some water if it is.
Dig a hole of an appropriate size for the potted plant you want to transfer into the garden. Carefully tip your potted plant upside down and it should come out in one big chunk. If it is stuck, squeeze the side of the pot as lightly as possible and it should then fall out. Place the roots of the plant into the hole and cover it with dirt. Press down slightly on the top soil of the plant to secure it into place. Finally, water thoroughly to help the plant adjust to its new home.
That's all there is to it. Now just watch your plant grow!
Take Advantage of Your Surroundings
While our main square foot garden bed will provide a good portion of our vegetable harvest, it never hurts to use what space you have available to the fullest potential. Many parts of the yard and house can be used as space for growing vegetables as well. It doesn't necessarily have to conform to the shape of a box.
I've listed a few examples below, but the key is to observe your own yard and identify ways to improve the efficiency of your growing operation.
Making A Free Trellis
The area I have to work with is about 100 - 120 sq. ft, give or take. Not a huge amount of space at all, and some of it is even shaded. However, my property is lined with a fence in the vegetable garden area, which can be used as a trellis for vegetables that grow on vines, like peas, green beans, tomatoes and more. All it takes is a little work.
I recently stopped by the Dollar Tree just to look around, and I noticed there was a stockpile of 420 ft. cotton yarn cylinders for $1 a piece. I bought one and used it to make a trellis out of my fence. I simply tied a long strand of yarn from each fence post every two feet in height. Here is the result:
I then planted different varieties of peas directly underneath the yarn. My hope is that the peas will use the yarn to climb the fence and produce lots of pods while still only using a small amount of space in the yard, since they will be growing vertically. I will update the guide with my results once the peas get large enough to climb.
 |
| My baby pea vines basking in the afternoon sun |
Once you have the wood, simply stake the sticks into the ground and use the cotton yard to tie them all together at one end. Then plant your seeds underneath the structure you just built. The seedlings will attempt to climb up each of the sticks, although you may need to assist them at first. This method will probably take up more space than using a fence, but you acquired the materials for virtually nothing.
Using Shade From Trees to Your Advantage
You can take advantage of the deciduous trees by planting tender greens--like lettuce, arugula, watercress, ect.--under them in the later winter and very early spring. The sun coming through the leafless tree branches in the winter will allow the seeds to germinate and grow a bit before the tree's leaves come in mid-spring, where it will provide a perfect spot in the shade for said greens. Leafy greens tend to bolt, or send out seed runners, when the soil gets too hot for the plant to handle. This helps the plant survive by producing seeds for the next generation of greens, but it has the bad side effect of making the greens terribly bitter. Keeping the soil moist and cool, like a semi-shady area under a deciduous tree, will keep the plant from bolting too quickly, extending your harvest.
The picture above shows the perfect area for my tender greens. Right now, it receives full sun for most of the day and it's a great spot for my lettuces to establish themselves. In a few weeks, however, a giant oak on my property will produce new leaves for the spring/summer and provide a nice shady area for the lettuce to maintain its growth over the season without going to seed and becoming bitter.
 |
| This season's first lettuce sprout |
More Tips
Efficient Water Practices
 |
| The most important resource |
Using rainwater caught in plastic containers or buckets is also a very good way to be efficient with your water usage. All you need to do is get a large container (1+ gallons, preferably), set it outside, and wait for it to rain. You'll want to figure out a way to cover the rainwater container, or put it in an area protected from the outside environment. Otherwise, it will quickly become a breeding ground for mosquitos.
Personally, I have collected a few 5-gallon buckets from various projects over the years and they make perfect rainwater collectors. I leave the buckets open until it rains, then cover them with a lid afterwards. Once I have rainwater collected, I use a plastic drinking cup with holes pokes in the bottom as a home made watering jug. It works well and I almost never need to use water from the tap for my garden.
Use the Seedlings You Thinned Out of Your Main Garden
Another trick I learned is that when you thin out your seedlings once they germinate, instead of just killing the extra sprouts, carefully pull them out of the ground and replant them somewhere else. It's a waste to just let the plant die when it can easily grow just about anywhere with dirt. If the plant dies, it's no big loss anyway, and if it lives, you'll have that much more food. If you have enough bag soil left over after everything, you could even pot it up and move it around the yard.
My wife is constantly being surprised when she finds some spinach or broccoli seedlings in her beds after I thin out my own seedlings. But she always welcomes more food being grown.
Use Weeds As Mulch/Compost
Don't throw those weeds in a bag. Toss them into the compost pile. They are a valuable source of nitrogen. You can also lay down cardboard boxes on the areas you step in the garden and cover them with pulled up weeds to create a mulch that prevents new weeds from sprouting.
 |
| Mulch your beds to conserve moisture and prevent weeds |
Succession Sow
Keep your harvests going all season long by planting seeds at two week intervals. By doing this, you will be harvesting fresh produce all season instead of everything being ready for harvest all at once.
Final Thoughts
If you've followed the guide from the beginning, you'll noticed we've accomplished quite a lot of work over a long period of time. The hardest part is now behind us. Other than a few random tasks like mulching and weeding, all we have to do now is sit back and wait for our food to grow. Similarly, since the most prudent information in this guide has now been published, this series is drawing to a close. Don't worry, though. I'm still going to post updates on the status of my garden, so you can see just how successful the garden will be using most of the techniques outlined in this guide. I will be writing a new series for that in a few weeks--stay tuned for that.
As always, if you have comments or questions on this part, or any part of my frugal food growing guide, I encourage you to make use of the comment form below. I love getting criticism as well as praise and questions, because they all help me improve as a gardener. I know in its current state, this guide is far from perfect, but for now I will consider it "mostly finished." I hope you were able to take anything mentioned here to help you save money, time and resources. Happy gardening!
Total Costs So Far
The total cost of growing your own food so far:
- $0.00 for home-made compost
- $0.25 for seed packets
- $1.00 for potting soil
- $1.00 for hand tools
- $5.00 for perennial plants
- $0.00 - $30.00 for lights (if you need/want to start transplants)
- $1.00 for cotton yarn (twine)
My total costs for this year: $28.11 (for vegetable/flower seed packets, potting soil, cotton yarn)
(We really wanted beets this year, and Dollar Tree was sold out of beet seeds. My wife found Burpee seed packets of beets at Walgreens for 40% off, as well as some flowers she had been wanting. That brought my total costs up by $3.57, in addition to the cotton yarn ($1.00)... for a total of $28.11 spent on gardening supplies. I will upload the receipt soon.)
 |
| Soon, our gardens will be producing wonderful fruits like this |
The next article is going to deal with plant maintenance, problems like diseases and pests, and few other random tidbits I left out of all the other articles. Stay tuned!
Comments