 |
| This site has a lot of potential for an apple orchard |
I must first give credit to the author of little house on the urban prairie, a blog that I started following after hearing Mark Shepard mention him/her on the permaculture podcast. It was his/her post titled "Chestnuts and Hazels for the Future" that I learned of this method of starting trees from seed. The author wrote the post in 2010, and he/she started hazelnuts and chestnuts using this method. According to post dated in September 2014, those trees can now be purchased for $10 a piece. If you're interested in buying a tree or two, follow this link to check out the details.
That being said, let's continue with my project currently underway.
Materials
For this project, you're going to need:
- 3-gallon plastic pot
- hardware cloth
- a pair of wire cutters
- some zip ties
- knife
 |
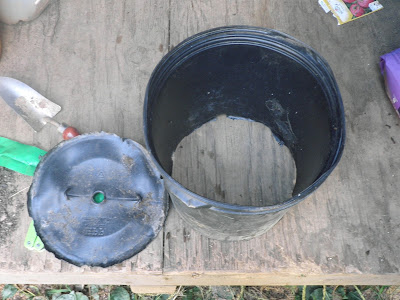
| Everything you'll need for this project, except for zip ties |
Total cost was roughly $19; nine for the hardware cloth, eight for the wire cutters, and two for the zip ties. I already had a knife. Imagine that.
Oh yeah, and you're also going to need a spot in your yard that is in a sunny location.
Instructions
Step 1 - Cut out the bottom of the pot.
Using the knife, cut out the bottom of the plastic pot. This is to prevent the bottom of the pot from interfering with the roots of the trees once they start growing in the ground. Shouldn't be too hard, unless the plastic is super thick.
Step 2 - Cut out a peice of hardware cloth and position it into the bottom of the pot.
Although we don't want the root growth to be inhibited, we also don't want critters digging up through the bottom of the pot to eat our seeds over the winter (however unlikely that is). The solution is to put hardware cloth in the bottom so the roots can grow through while preventing any moles, voles or groundhogs from gaining access to them from the bottom. Use the wire cutters to cut out of piece of hardware cloth to stick into the bottom of the pot. I simply fitted it snugly into the bottom without using any zip ties.
Step 3 - Pick a sunny spot in the yard and dig a hole slightly smaller than the size of the pot.
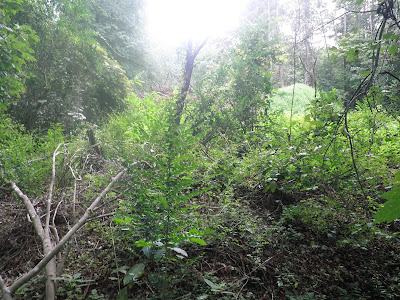
If you have nice spot in your yard that's easy to get to and gets plenty of sun, that's great. Less work for you. I, however, only had a spot with enough sun where plenty of new vegetation (including wild grape vines, invasive roses, oriental bittersweet plants, and more) had already started growing. So I had to spend a few days hacking away at vines, pulling weeds and piling up dead branches to get my area ready for planting. The picture above is what I started with.
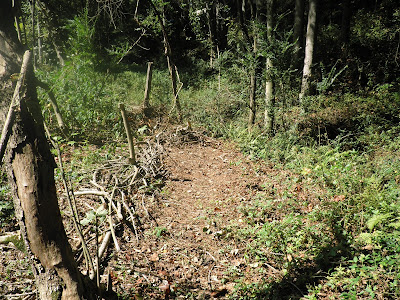
Ahh, that's a little easier to work with. Now to find the perfect spot.
This little patch seems as good as any. Time to dig the hole for the pot.
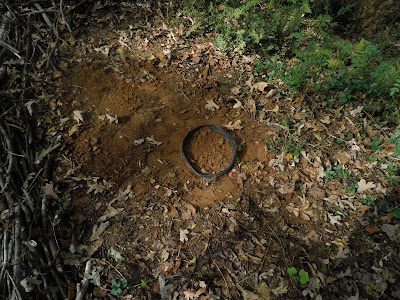
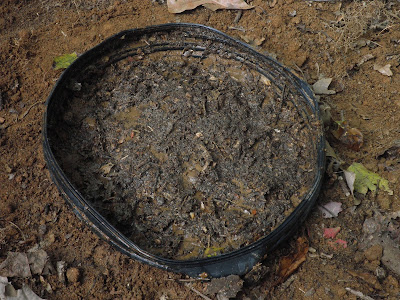
Pile up the dirt to the side, as you're going to be using it to fill the pot. Set your pot in the hole, with about 1 inch (2.5 cm) of the pot still above the ground. Then backfill the pot with the soil you dug up, as well as burying the outside the pot.
It should look something like this when this step is completed. Hopefully I explained it clear enough.
Step 4 - Plant your seeds in the pot.
I decided to only grow one type of tree to keep it simple, since this will be my first time doing a project like this. I didn't want to get too overwhelmed with the whole thing. I collected a few dozen apple seeds from apples bought in the store, as well as from seeds from the nearby high school's apple orchard.
Spread the seeds out evenly on top of the soil you just put into the pot.
Once your seeds are in the pot, put another layer of soil over them and give the pot a good watering.
Now that your seeds are planted, it's time to protect them from critters that would take them from above. Using the wire cutters, cut out a piece of hardware cloth just big enough to cover the top of the pot. Use the knife to pole holes into the sides of the pot, insert a zip tie through each hole, and then tie it through the hardware cloth. It'll look like this:
Spread the seeds out evenly on top of the soil you just put into the pot.
Once your seeds are in the pot, put another layer of soil over them and give the pot a good watering.
Step 5 - Attach hardware cloth to the top of the pot using zip ties.
Now that your seeds are planted, it's time to protect them from critters that would take them from above. Using the wire cutters, cut out a piece of hardware cloth just big enough to cover the top of the pot. Use the knife to pole holes into the sides of the pot, insert a zip tie through each hole, and then tie it through the hardware cloth. It'll look like this:
Step 6 - Mulch the pot heavily.
Use some kind of organic matter to mulch the pot, which will provide a little protection from hard freezes and the compacting force of the rain. I used old leaves in my situation, but you could use hay, straw or old grass clippings as well. Just make sure the is plenty of it.
Conclusion
Well, that's pretty much all there is to the planting out the seeds. Now I am to wait until Spring, at which time I will remove the mulch, allowing the ground to warm and hopefully signal the apple seed to germinate and grow. If they do start growing, I am to leave the tender seedlings growing in the pot for another year. If they make it through the next winter, the trees will be ready to plant or sell.
So it looks like all there is left to do is wait. I will be quite honest... I am not 100% sure this is going to work. I'm fairly confident, but still not completely sure. But at least the seeds were easy to come by, and I only spent $19 on materials for the whole project. On the bright side, if they seeds do grow into tiny trees, I will be well on my way to have several dozen apple trees, hopefully some of which will produce useful or tasty apples in a few years. At that point, I could sell them for a reasonable price or try to grow them out myself if they seem to have potential.
I will be sure to update the blog in the comings months to report if the project was a success or failure. I hope you enjoyed the first part of this article series, and if you found it useful, perhaps consider sharing it with your friends and neighbors. You never know who might be wanting to grow some trees!








Comments